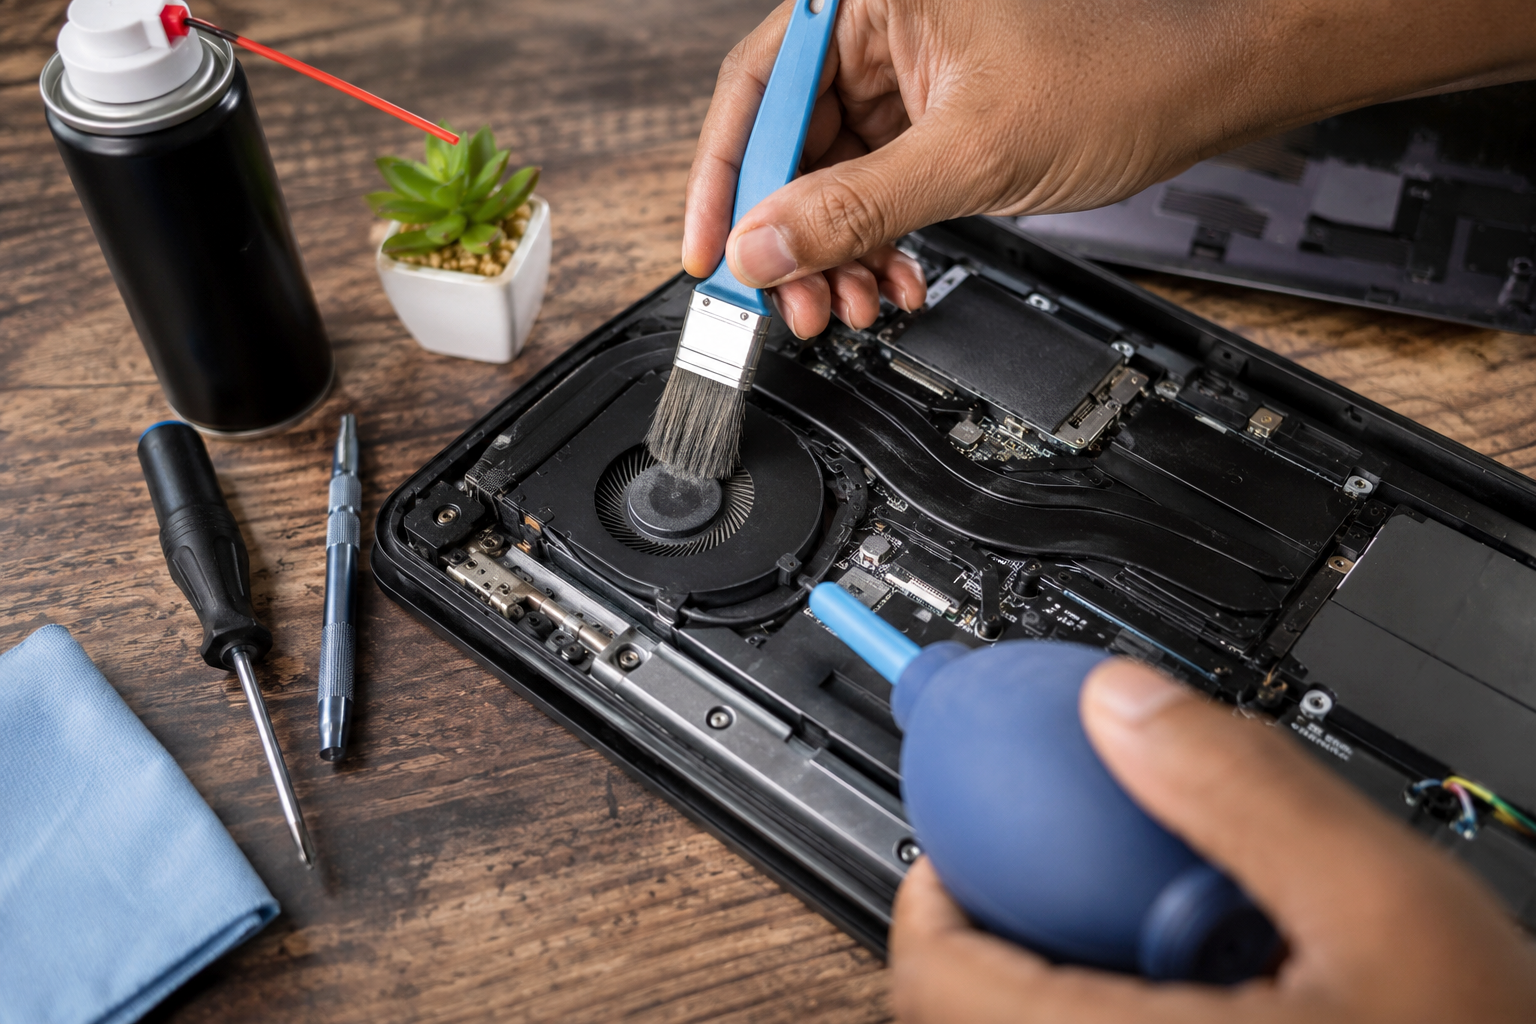
A laptop’s cooling fan plays an important role in preventing the processor and other internal components from getting too hot. Over time, dust, hair, and lint can collect around the fan and ventilation openings, restricting the flow of air. This may cause the fan to run more loudly, increase the laptop’s temperature, or even lead to slower performance when the system gets too hot. The good news is that basic fan and vent cleaning can often be done without opening the laptop and also Opening the Bottom Cover. In this guide, you’ll learn practical ways to clean a laptop fan safely, the tools that can help, common mistakes to avoid, and how to check the cooling system after cleaning.
Also read: Why Is My Computer Fan So Loud
Why Should You Clean a Laptop Fan?
A clean fan helps your laptop release heat properly and maintain stable performance. Dust and lint can block airflow over time, making the cooling system work harder. Here are the main reasons to clean your laptop fan:
- Reduce Fan Noise: Removing dust can help prevent the fan from working harder than necessary.
- Improve Airflow: Clean vents allow air to move through the cooling system more easily.
- Control Heat: Better airflow helps the laptop manage heat during use.
- Maintain Performance: Keeping temperatures under control can help reduce heat-related slowdowns.
- Prevent Dust Buildup: Regular cleaning stops small amounts of dust from developing into larger blockages.
- Protect the Cooling System: Good airflow reduces unnecessary strain on the fan and other cooling components.
Also read: How to Connect Airpods to Laptop
Signs Your Laptop Fan Needs Cleaning
Before you start cleaning, check whether your laptop is showing any signs of restricted airflow or dust buildup. These are some common warning signs:
1. Unusual Fan Noise: If the fan suddenly becomes louder than normal, dust may be making it work harder to keep the laptop cool.
2. Excessive Heat: A laptop that feels unusually hot during normal use may have blocked vents or a cooling system struggling to remove heat.
3. Fan Runs Frequently: If the fan keeps running even when you are performing simple tasks, restricted airflow or high background activity could be responsible.
4. Weak Airflow: If very little warm air comes from the exhaust vent while the laptop is running, dust may be limiting proper airflow.
5. Visible Dust: Dust or lint around the laptop’s ventilation openings is a clear sign that the cooling system may need attention.
Safety Precautions Before Cleaning
Before cleaning your laptop fan, take a few simple precautions to avoid damaging the device:
- Shut Down the Laptop: Turn the laptop off completely before cleaning. Avoid cleaning the vents while it is running.
- Disconnect Everything: Unplug the charger and remove USB devices, headphones, memory cards, and other accessories.
- Allow It to Cool: If the laptop has been running hot, wait until it has cooled down before starting.
- Use a Clean, Dry Surface: Work on a dry area away from water, food, or anything that could enter the ventilation openings.
- Follow Compressed-Air Instructions: Read the directions on the can and use it only as recommended by the manufacturer.
- Keep Liquids Away: Never spray water, cleaning products, or other liquids into the laptop or its vents.
What You Need to Clean a Laptop Fan
For basic laptop fan cleaning, gather these items:
- Compressed air made for electronics
- Clean, soft microfiber cloth
- Soft, dry brush
- Clean, flat workspace
- Small precision screwdriver (if opening the laptop)
How to Clean a Laptop Fan Without Opening It
If you do not want to remove your laptop’s bottom cover, you can still clean dust from the cooling vents and other accessible areas. This method below is mainly useful for removing loose dust and improving airflow without opening the computer:
1. Shut Down and Unplug the Laptop
Save anything you are working on and shut the laptop down completely. Disconnect the charger, USB devices, headphones, and other accessories. If the laptop has been running hot, let it cool for a few minutes before cleaning.
2. Locate the Ventilation Openings
Check the bottom, sides, and rear of the laptop for air vents. Intake vents bring air into the cooling system, while exhaust vents release warm air. Their location differs between models, so check your laptop’s manual if you are unsure.
3. Wipe Away Surface Dust
Use a clean, dry microfiber cloth to wipe the area around the vents. For visible dust or lint, gently use a soft, dry brush. Avoid pushing the brush deep into the openings because this could force debris farther inside.
4. Prepare the Compressed Air
Read the instructions on your compressed-air can before using it. Hold it in the recommended position and use short bursts rather than continuously spraying air. This gives you better control and reduces the risk of moisture or excessive airflow entering the laptop.
5. Blow Dust Out of the Vents
Hold the nozzle close to, but not directly against, the ventilation opening. Apply short bursts of air around the intake and exhaust vents to loosen trapped dust. Clean both areas where possible so that dust is not simply moved from one part of the airflow path to another. Important: Avoid using compressed air to make the internal fan spin rapidly. Excessive fan rotation can put unnecessary stress on the fan. Controlled bursts are a safer approach.
6. Wipe the Laptop Again
After blowing out the vents, some loosened dust may settle on the laptop’s surface. Use the microfiber cloth to remove it. Keep liquids away from the ventilation openings and never use a wet cloth around them.
7. Inspect the Vents for Remaining Dust
Use a light to check the ventilation openings. If you can see thick or tightly packed dust deeper inside, cleaning from the outside may not be enough. Do not insert sharp objects or force debris through the vents. If the blockage is severe, consider having the laptop professionally cleaned.
8. Turn On and Test the Fan
After cleaning, reconnect the charger if needed and turn on the laptop. Listen for unusual fan sounds and place your hand near the exhaust vent to check for normal airflow. The fan may stay quiet during light use because many laptops automatically adjust fan speed according to temperature. After using the laptop for a while, check that the fan is operating normally and that the computer is not becoming unusually hot.
How to Clean a Laptop Fan by Opening the Bottom Cover
If cleaning the vents from outside is not enough, you may need to remove the laptop’s bottom cover to reach the fan and heatsink directly. This requires extra care around delicate components, so check your laptop’s manual first. Below are the steps for How to Clean a Laptop Fan by Opening the Bottom Cover:
1. Shut Down and Unplug the Laptop
Turn the laptop off completely and disconnect the charger, USB devices, headphones, and other accessories. Allow the laptop to cool down before opening it, especially if it has recently been running hot.
2. Prepare a Clean Work Area
Place the laptop on a clean, dry, non-conductive surface with enough room to organize the screws and components. Use the correct screwdriver for your laptop so you do not damage the screws.
3. Remove the Bottom Cover Carefully
Take out the screws holding the bottom panel in place. Gently release the cover according to the design of your laptop. Do not force the panel if it refuses to come off, as some models use clips, hidden screws, or other fasteners that can break.
4. Disconnect the Battery if Required
Once the cover is removed, check the manufacturer’s service instructions to determine whether the internal battery should be disconnected before cleaning. Avoid touching unnecessary components, cables, or connectors.
5. Locate and Inspect the Fan
Find the cooling fan and heatsink inside the laptop. Look for accumulated dust, hair, lint, or other debris around the fan blades, heatsink fins, and nearby ventilation areas. A heavily clogged heatsink can restrict airflow even when the fan itself looks relatively clean.
6. Clean the Fan and Heatsink
Use short, controlled bursts of suitable compressed air to loosen dust from the fan and heatsink. A soft brush can help remove stubborn buildup from accessible areas. Avoid forcing the fan to spin rapidly with compressed air, and work gently so you do not damage the blades, cables, or other internal parts.
7. Check Everything Before Closing the Laptop
Inspect the cooling area again and make sure loose dust has been removed. Check that no tools, pieces of debris, or disconnected cables have been left inside. Reconnect anything that was disconnected according to the manufacturer’s instructions.
8. Replace the Bottom Cover and Test the Laptop
Carefully reinstall the bottom panel and tighten the screws without applying excessive force. Turn the laptop on and listen to the fan while checking the exhaust airflow. The fan may stay quiet during light use, but it should respond normally when the laptop becomes warmer. If unusual noise, overheating, or fan problems continue after cleaning, professional servicing may be necessary.
Also read: why is my laptop so slow
What Not to Do When Cleaning a Laptop Fan
Cleaning a laptop fan requires care. Avoid these below mistakes to protect the fan and other internal components:
1. Do Not Use Water: Never pour or spray water into the laptop. Moisture can cause serious damage to electronic parts.
2. Avoid Household Cleaning Sprays: Do not spray regular cleaning products into the vents. Keep liquids away from the laptop’s cooling system.
3. Do Not Push Objects Into the Vents: Avoid inserting toothpicks, screwdrivers, metal tools, or other objects into the openings. They can damage the fan, cables, or internal components.
4. Do Not Force the Bottom Cover: If the cover does not come off easily, stop and check the correct instructions for your laptop model. Forcing it can break clips or other parts.
5. Do Not Ignore Unusual Fan Noises: Grinding, rattling, or other unusual sounds may indicate a damaged or worn fan. Cleaning alone may not solve the problem.
6. Do Not Assume Dust Is Always the Cause: Overheating can also result from heavy software use, blocked airflow, faulty cooling components, or other hardware problems. If cleaning does not help, further troubleshooting or professional service may be necessary.
Also read: Why Does My Laptop Battery Drain So Fast?
How to Prevent Dust From Building Up Again
Once your laptop fan is clean, a few simple habits can help reduce dust buildup and maintain proper airflow. Below are some ways to prevent dust from building up again:
1. Use Your Laptop on a Hard Surface: Place the laptop on a desk, table, or another firm surface. Beds, blankets, pillows, and carpets can block the ventilation openings.
2. Keep Your Workspace Clean: Regularly remove dust from the area around your laptop. A cleaner workspace means fewer particles are likely to enter the cooling system.
3. Keep the Air Vents Clear: Avoid placing objects directly over or against the laptop’s intake and exhaust vents. Good airflow helps the cooling system work effectively.
4. Clean the Area Regularly: Dust your desk and the surrounding area regularly to reduce the amount of dust that can reach the laptop.
5. Use a Suitable Laptop Stand: Depending on your laptop’s design, a properly fitted stand can create more space around the bottom vents and improve airflow.
Also read: Laptop Shuts Down When Unplugged
Conclusion
Cleaning your laptop fan regularly can help maintain good airflow, reduce unnecessary fan noise, and prevent dust from interfering with the cooling system. For light dust buildup, cleaning the vents from the outside is a simple first step, while heavily clogged fans may require careful internal cleaning or professional service. Always shut down and unplug the laptop before cleaning, use the proper tools, and avoid liquids or forcing objects into the vents. By keeping the laptop on a hard surface and maintaining a clean workspace, you can also reduce future dust buildup and help your laptop’s cooling system work properly.
Frequently Asked Questions
1. Should I turn off my laptop before cleaning the fan?
Yes. Shut the laptop down completely before cleaning. Unplug the charger and remove any connected accessories. If the laptop has been running for a long time or feels hot, allow it to cool before you begin.
2. Can dust make a laptop fan noisy?
Yes. Dust and lint can restrict airflow, causing the fan to work harder and become louder. However, unusual fan noise can also result from a worn bearing, damaged fan blades, or another hardware issue. If the noise continues after cleaning, the fan may need further inspection.
3. How do I know if my laptop fan needs cleaning?
Common signs include visible dust around the ventilation openings, louder-than-usual fan noise, weak airflow from the exhaust vent, frequent fan activity, or higher temperatures during normal use. These signs do not always mean dust is the cause, but they are good reasons to inspect the cooling system.
4. Can I use a toothbrush to clean my laptop fan?
A clean, soft, dry brush can help remove dust from areas that are safely accessible. Avoid hard or stiff bristles, and never push a brush deep into the vents. When cleaning an exposed fan, work gently to avoid damaging the blades or nearby components.
5. Can I use a vacuum cleaner to clean my laptop fan?
It is generally better to avoid placing a household vacuum directly against the laptop’s internal components. Strong suction and static electricity can create unnecessary risks. For routine cleaning, use a method recommended for your particular laptop, such as controlled compressed air.
6. How long does it take to clean a laptop fan?
Cleaning the external vents can take only a few minutes when there is light dust buildup. Cleaning an internal fan can take longer because the bottom cover may need to be removed and the cooling components accessed carefully. The amount of dust and the laptop’s design also affect the time required.
7. Can I clean my laptop fan while the laptop is running?
No. It is safer to shut the laptop down completely and disconnect the power before cleaning. Working on a powered device increases the chance of accidental damage, especially if cleaning equipment or objects come into contact with the vents or internal components.
8. Should I clean a laptop fan without opening it?
Yes. External cleaning is a sensible first step, especially if you are not experienced with laptop repairs. You can remove loose dust from the ventilation openings without taking apart the computer. However, this method has limits. If thick dust is trapped around the internal fan or heatsink, opening the laptop or getting professional help may be necessary for a more thorough cleaning.
9. Can cleaning the fan make a laptop faster?
Cleaning the fan does not increase the laptop’s processing power. However, removing dust can improve airflow and help the cooling system manage heat more effectively. If excessive heat was causing the laptop to reduce its performance, better cooling may help it maintain normal performance during demanding tasks.
10. How often should you clean a laptop fan?
There is no fixed schedule that works for every laptop. Cleaning needs depend on factors such as how often you use the computer, where you use it, and how much dust is present in the environment. A laptop used around pets, carpets, workshops, or dusty areas may need attention more often. Instead of following a strict timetable, inspect the vents regularly and clean them when you notice visible dust, weaker airflow, increased fan noise, or unusual heat.