How to Transfer Photos from iPhone to Computer

If you’re looking for the easiest way to move your iPhone photos onto your computer, you’re in luck. There are several fast and reliable methods that let you transfer pictures from your iPhone to a Windows PC without hassle. Whether you want to free up space, back up your memories, or edit images on a bigger screen, this guide will walk you through simple step-by-step options to get your photos safely copied to your computer in just a few minutes. The best part is that you don’t need any complicated tools—just your iPhone, a computer, and a few quick settings. No matter if you prefer using a USB cable, cloud storage, or wireless transfer, you’ll find a method here that fits your needs. By the end, you’ll know exactly how to keep your photos secure and accessible whenever you need them.
Also read: How to Connect Airpods to Laptop
6 Best Methods to Transfer Photos from iPhone to Computer (Step-by-Step)
Method 1: Transfer Photos from iPhone to PC with iCloud Photos
Using iCloud Photos is one of the most convenient ways to move pictures from your iPhone to a Windows computer. By turning on iCloud on your phone and installing the Windows version on your PC, your photos will appear automatically whenever you’re connected to Wi-Fi. Follow these four steps to set everything up:
1. Turn on iCloud Photos on your iPhone
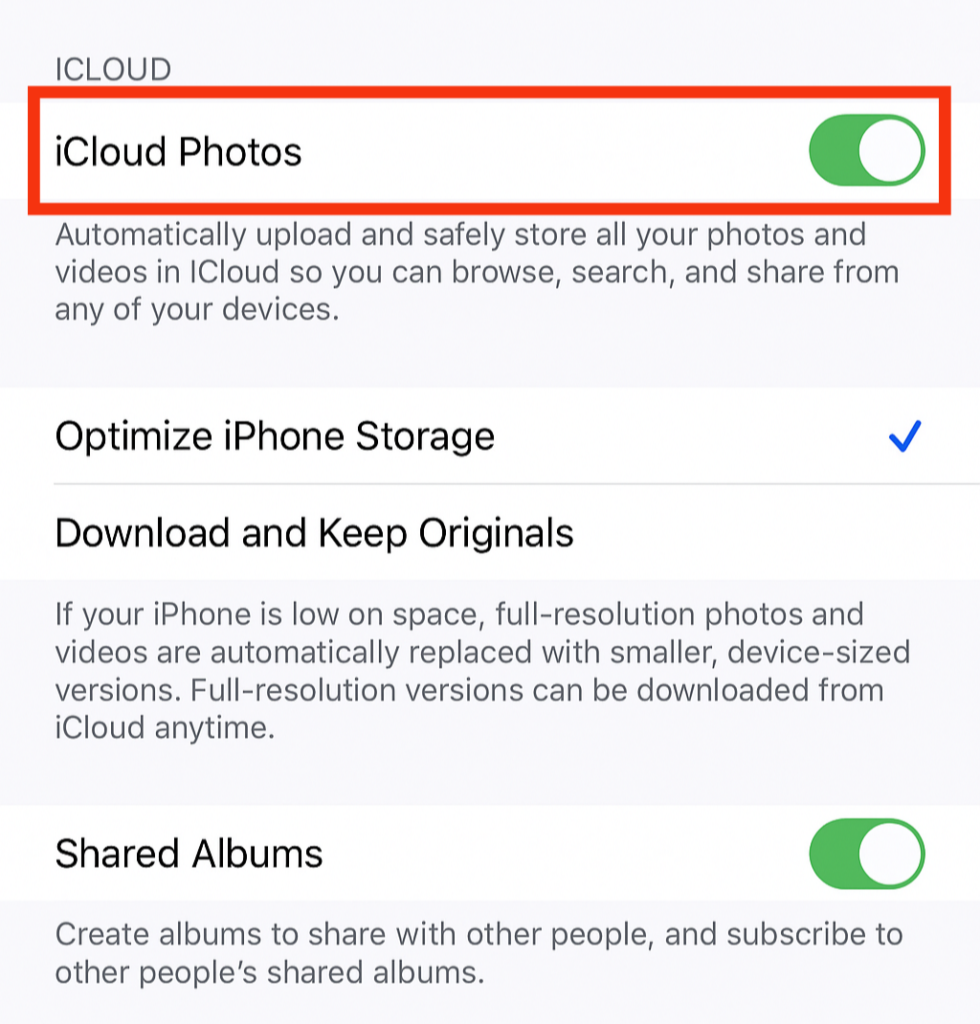
Go to Settings on your iPhone, scroll to Photos, and switch on iCloud Photos (older models may show iCloud Photo Library). Once this option is active, every new photo you capture is uploaded directly to iCloud when Wi-Fi is available, so your images are always backed up and ready for access on other devices.
2. Download and install iCloud for Windows
On your PC, install the official iCloud for Windows app from Apple’s website. After installation, launch the program and sign in with the same Apple ID you use on your iPhone. This ensures your iPhone photos sync with your computer correctly.
3. Set up photo syncing in iCloud for Windows
Inside the iCloud application, check the box beside Photos and then choose Options.
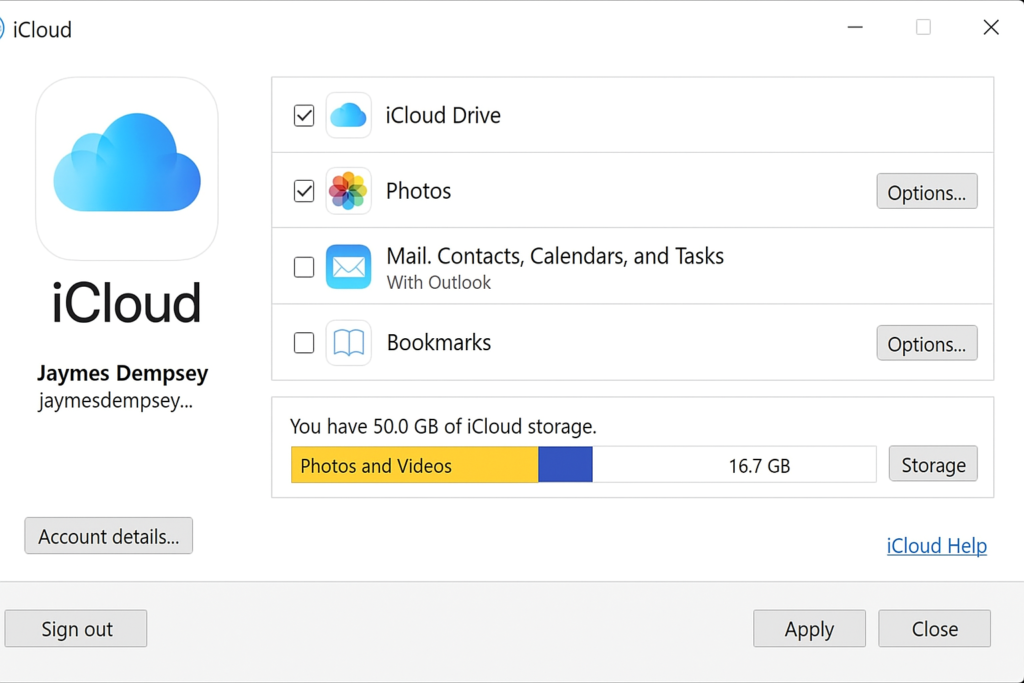
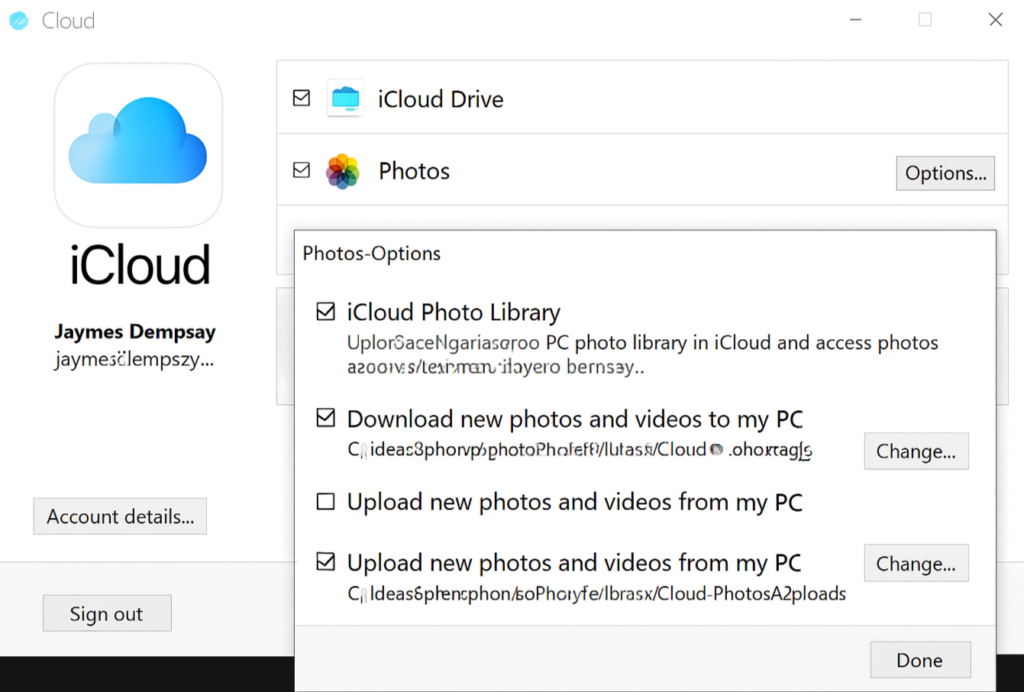
- Tick iCloud Photo Library and also select Download new photos and videos to my PC. If you’d like pictures from your PC to upload back into iCloud, tick Upload new photos and videos from my PC as well. Confirm by clicking Done and then Apply.
4. Find your photos on your PC
Whenever your phone connects to Wi-Fi, your pictures will appear on your PC. Open File Explorer (or Windows Explorer if using Windows 7), click on This PC (or Computer), and then open iCloud Photos.
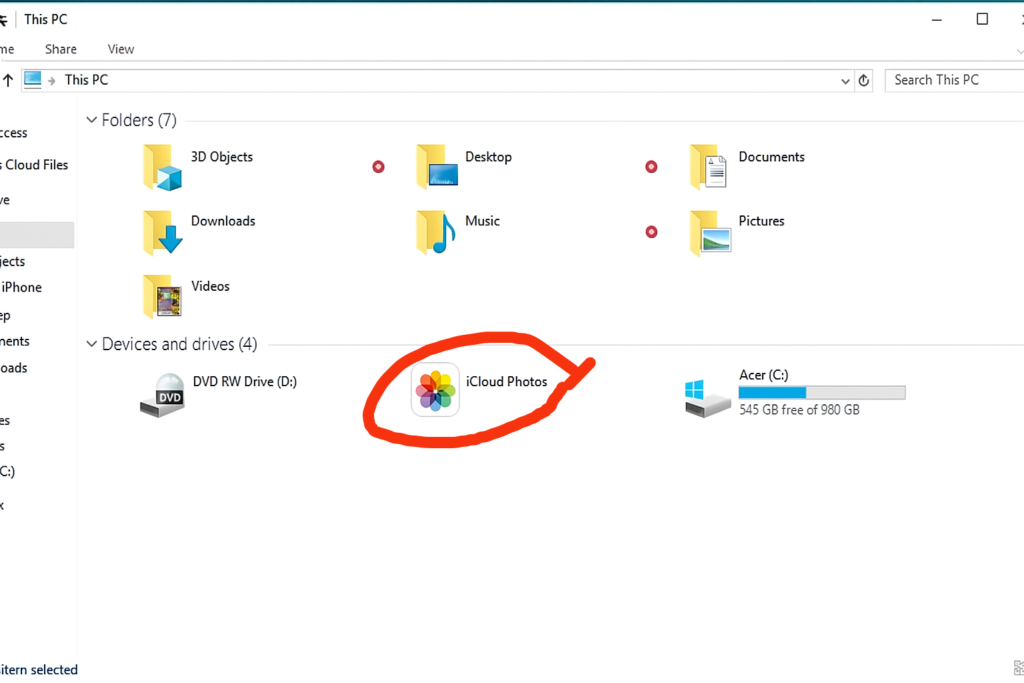
- Inside the Downloads folder, you’ll see all your iCloud images ready to view or organize.

Method 2: Download Photos from iPhone to PC Using iCloud.com
Another simple way to move photos from your iPhone to your computer is through iCloud.com. This method doesn’t require you to install any software on your PC—just a web browser and your Apple ID. Once you’ve enabled iCloud Photos on your iPhone, you can sign in online and download any images directly to your computer. Follow these four steps to get started:
1. Enable iCloud Photos on your iPhone
On your iPhone, go to Settings > Photos and turn on iCloud Photos. This ensures your pictures upload automatically to iCloud, making them accessible from a browser on your computer at any time.
2. Sign in to iCloud.com from your PC
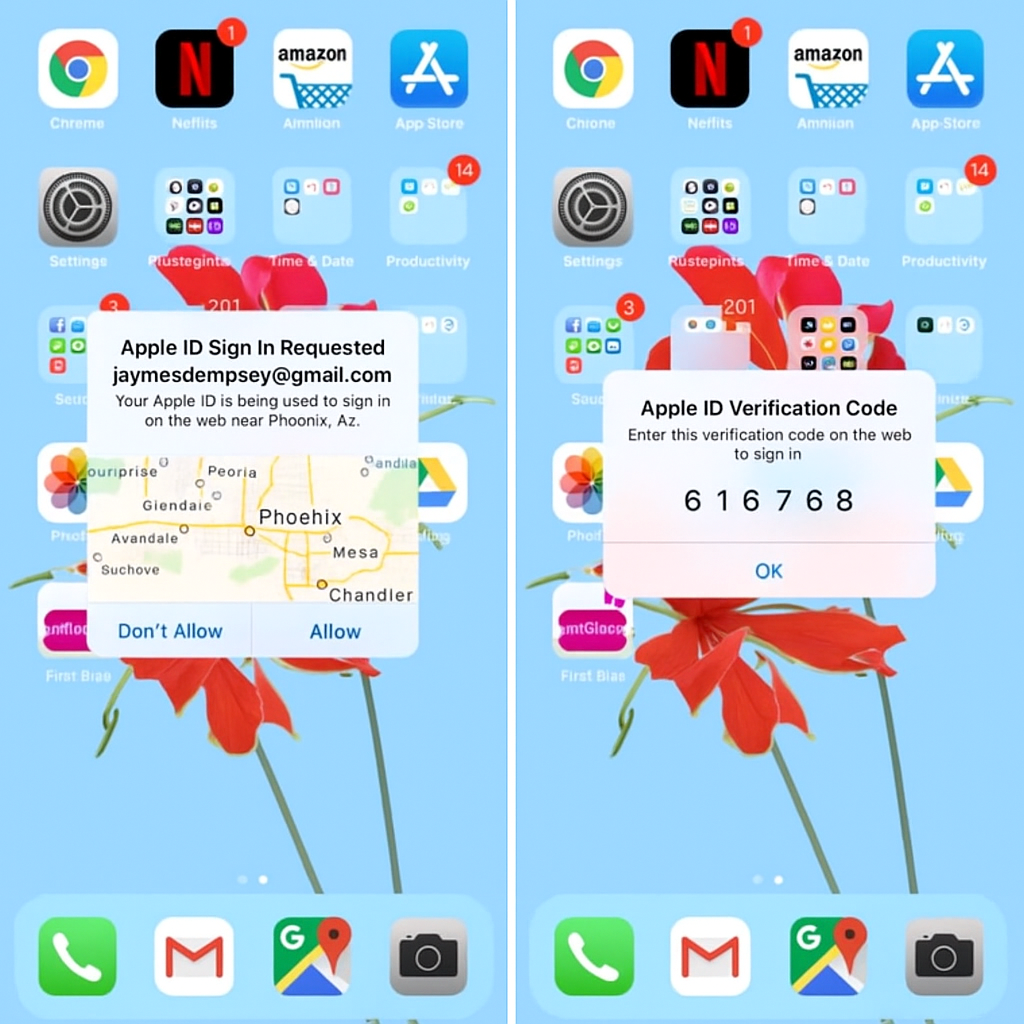
Open your preferred web browser and go to iCloud.com. Enter your Apple ID and password. If two-factor authentication is turned on, you’ll receive a verification code on your iPhone. Tap Allow when prompted, then type the six-digit code into your PC browser to complete the login. If you’d like to avoid repeating this step every time, you can choose to trust the computer.
3. Access your iPhone photos online
Once signed in, click the Photos icon. You’ll see your photo library organized in a way that looks very similar to the Photos app on your iPhone.
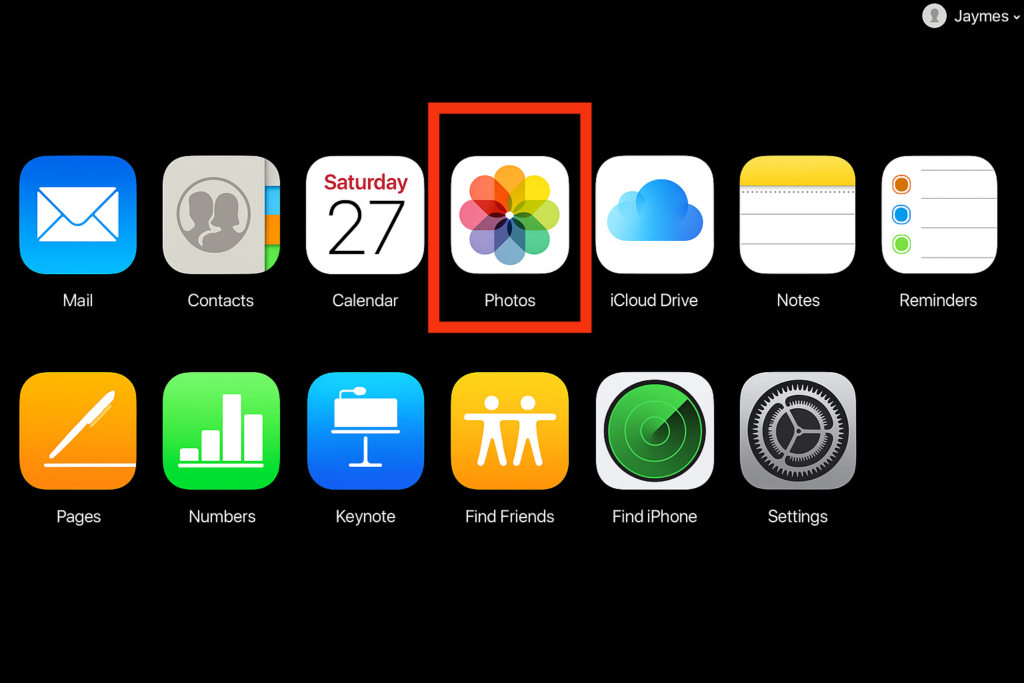
From the sidebar, you can browse by media type or navigate through your albums to find the exact pictures you want.

4. Download your images to your PC
Select the photos you’d like to save, then click the Download icon (a cloud with a downward arrow) at the top of the screen.
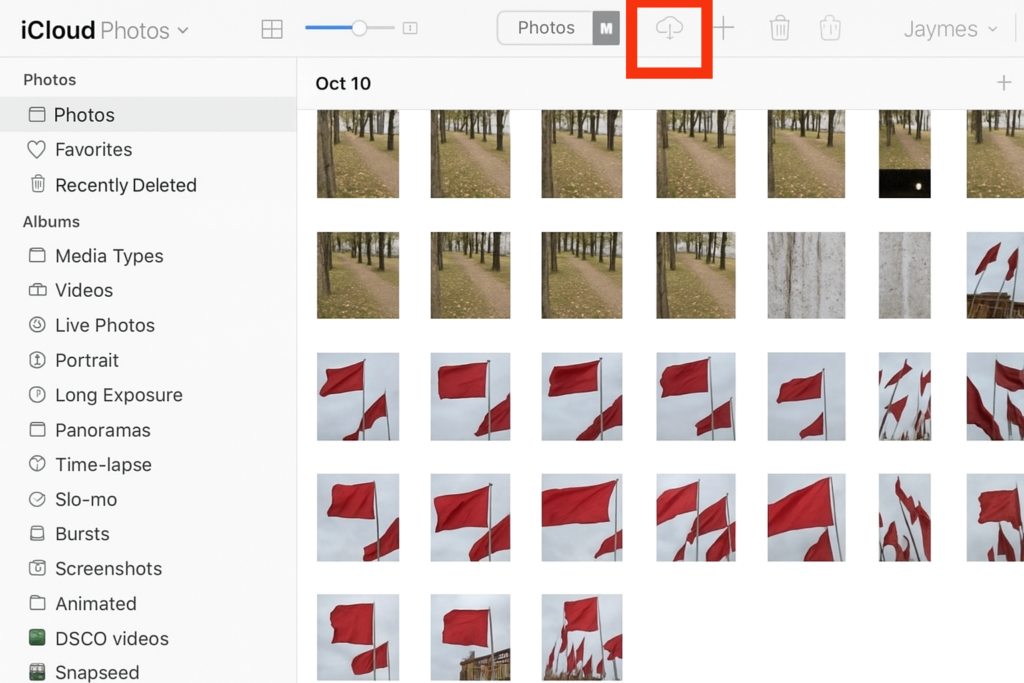
- These files will be stored in your computer’s Downloads folder. From there, you can move them into your Pictures folder or any other location you prefer.
This method is quick, wireless, and works on any computer with internet access—making it perfect if you don’t want to install additional apps or connect your iPhone with a cable.
Method 3: Import Photos from iPhone to PC Using the Windows Photos App
If you’re running Windows 8 or Windows 10, one of the simplest ways to transfer pictures is through the Windows Photos app (also called Microsoft Photos). This program is already included with your operating system, so you don’t need to install anything extra to get started.
1. Update iTunes on your PC
Before connecting your iPhone, make sure you have the most recent version of iTunes installed. To check, open iTunes, click Help, and then select Check for Updates. Follow the on-screen instructions to install the newest release. Having iTunes updated ensures your PC can properly detect your iPhone.
2. Connect your iPhone to your computer
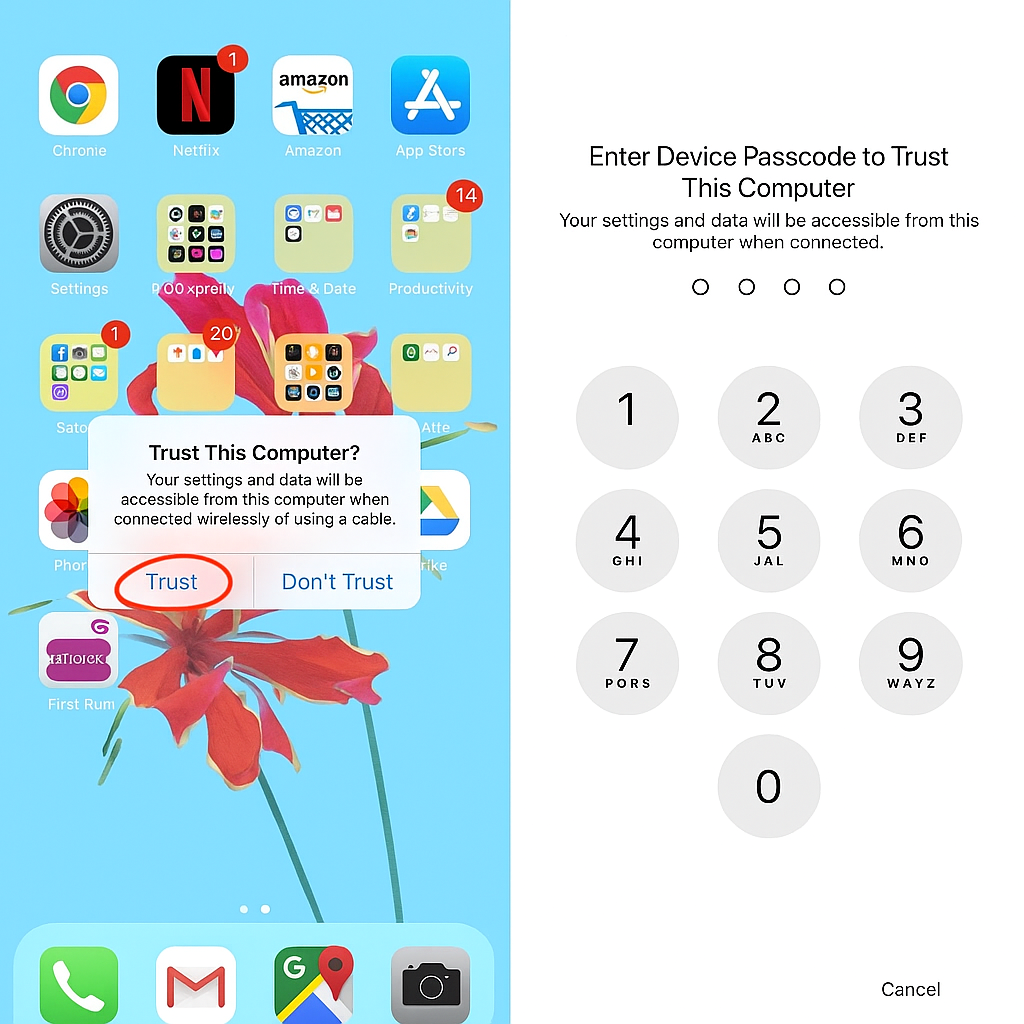
Use your standard USB charging cable to connect the iPhone to your PC. A prompt may appear on your phone asking whether you trust this computer or if you want to allow access to your photos and videos. Tap Trust or Allow, and then enter your passcode if required.
3. Open the Photos app on Windows
On your PC, go to the Start menu and search for Photos. Once the app is open, you’ll see an option to import images from your iPhone. In Windows 10, this option is located in the top-right corner. In Windows 8, right-click anywhere inside the app to reveal the Import option.
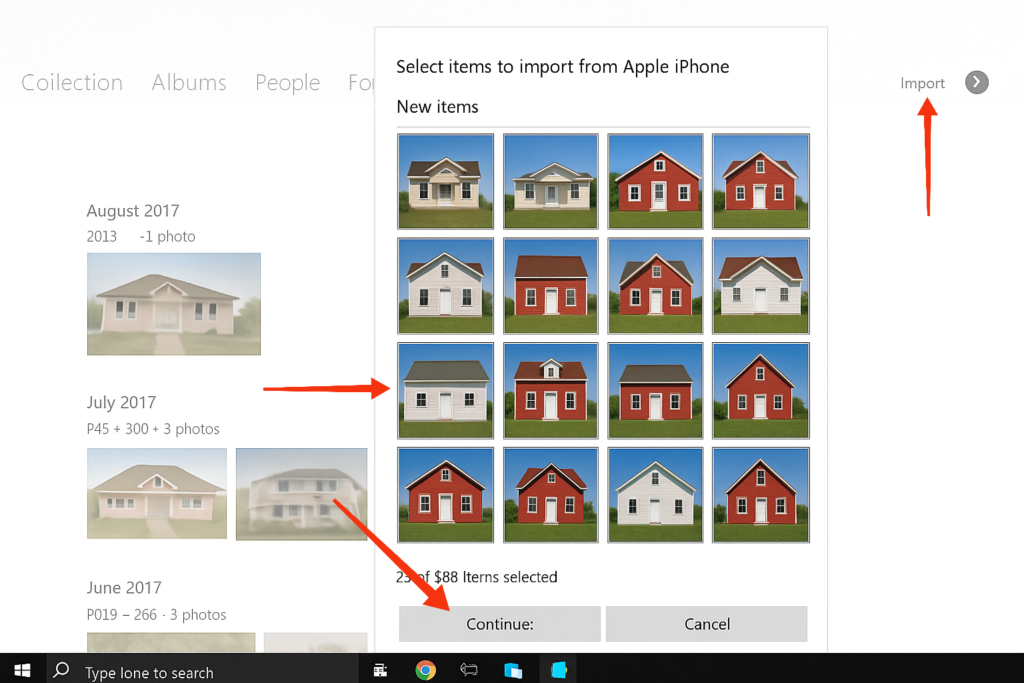
4. Import your iPhone pictures
Click Import, then choose the photos you want to move. If you’re on Windows 8, you may need to click Import again. On Windows 10, select Continue and then Import, or in some cases, simply click Import Selected. The transfer will begin immediately.
5. Locate your transferred photos
When the import finishes, your pictures will be placed inside your computer’s Pictures folder, organized into subfolders by date. From here, you can edit, move, or back them up as needed.
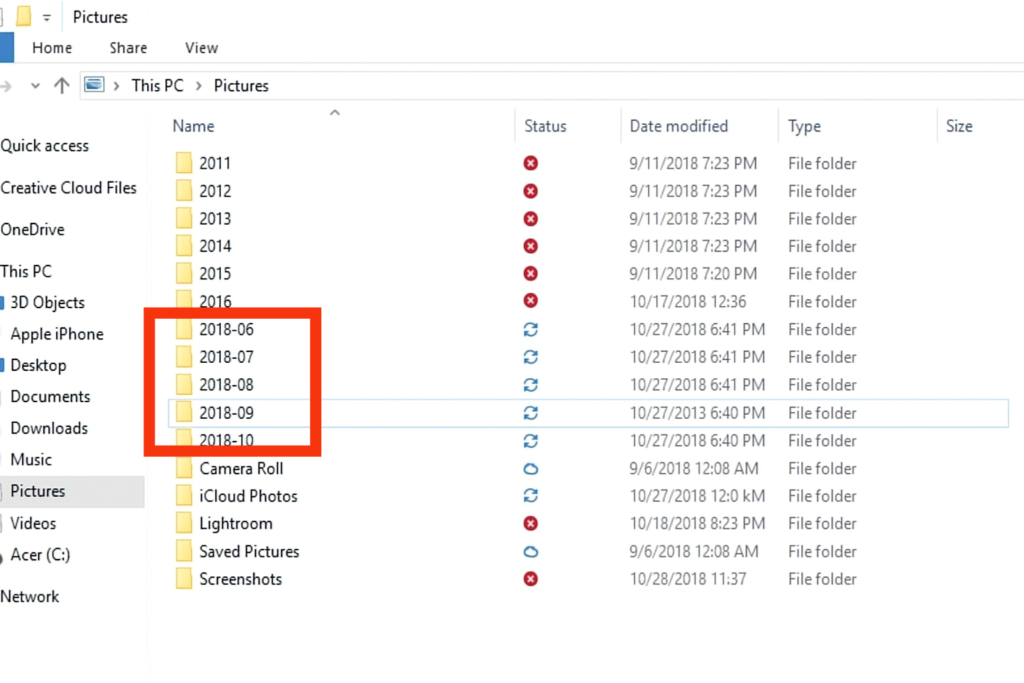
The Windows Photos app provides a straightforward, built-in way to copy your iPhone photos onto a PC without needing extra tools.
Method 4: Transfer Photos from iPhone to PC Using Windows AutoPlay
If you’re using a Windows 7 computer, you won’t find the modern Photos app available. That’s because Windows 7 doesn’t include it. Instead, you can rely on Windows AutoPlay to move your images quickly from iPhone to PC.
Step 1: Connect your iPhone
Plug your iPhone into your computer with the USB cable. When prompted on your iPhone, tap Trust and enter your passcode to grant access.
Step 2: Open AutoPlay
As soon as your device is recognized, the AutoPlay window should appear automatically. From the available options, click Import Pictures and Videos. Be sure to select the option that lists Photos, not the one linked to Dropbox or other services.
Step 3: Import your photos
Windows will then begin importing your iPhone pictures directly to your computer. The default save location is the Pictures folder, where images are neatly arranged into subfolders by the date they were imported.
That’s it! AutoPlay makes the process straightforward for Windows 7 users, letting you transfer photos in just a few clicks without any extra software.
Method 5: Transfer Photos from iPhone to PC (USB vs. Wireless)
When it comes to moving pictures from an iPhone to a Windows computer, you generally have two main options.
1. Transfer with a USB cable
This method requires your iPhone’s charging cable. Simply plug one end into your phone and the other into a USB port on your computer. From there, you can copy photos directly.
2. Transfer wirelessly with iCloud
If you prefer a cable-free option, you can use Wi-Fi along with an Apple iCloud account. This lets you sync and download your photos without connecting your phone physically.

Method 6: Transfer Photos from iPhone to Computer via File Explorer
Another reliable way to transfer pictures from iPhone to PC is by using File Explorer (called Windows Explorer on Windows 7). This method doesn’t require installing any extra programs and works through your iPhone’s internal storage.
Step 1: Connect your iPhone
Plug your iPhone into your PC with the USB cable. When your phone prompts for permissions, tap Trust or Allow, and enter your passcode if needed.
Step 2: Locate your iPhone on Windows
- On Windows 8 or Windows 10, open File Explorer. Under This PC, you’ll see your device listed as Apple iPhone. Double-click it.
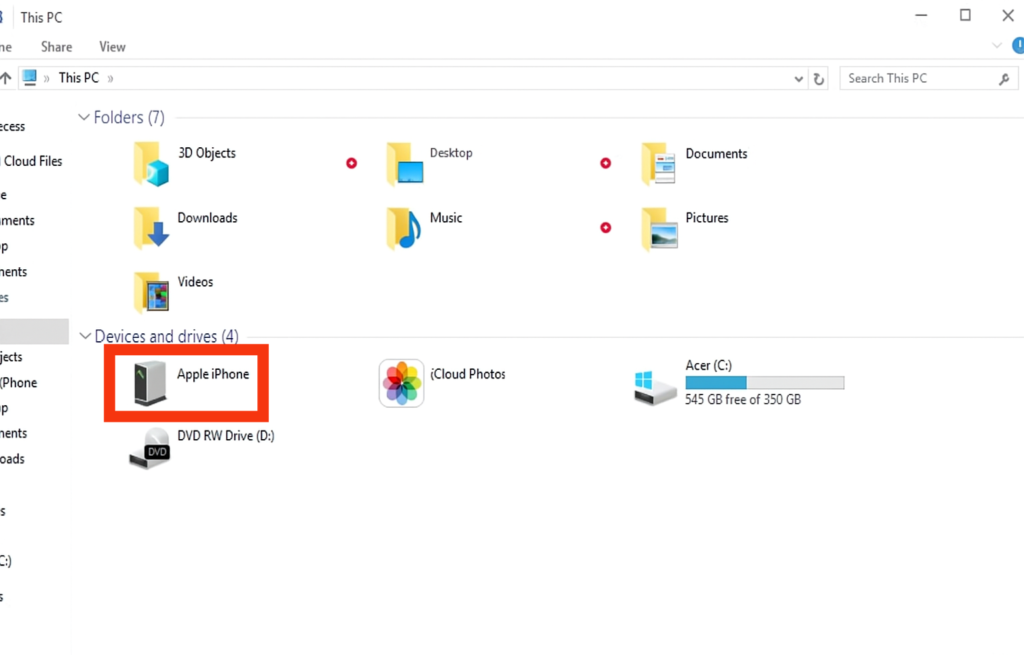
- On Windows 7, open Windows Explorer. Under Computer, you’ll also find your device labeled Apple iPhone. Double-click to open.
Step 3: Access your iPhone’s storage
After opening your device, navigate to Internal Storage and then the DCIM folder. Inside, you’ll see multiple folders containing your images and videos. These folders are usually named something like 100APPLE, 101APPLE, 100CLOUD, etc.

Step 4: Copy your photos
- To transfer all photos, select every folder, right-click, and choose Copy. Then go to your computer’s Pictures folder, right-click an empty space, and hit Paste. The transfer will begin immediately.
- To move specific images, open a folder like 100APPLE. You’ll see thumbnails of your photos. Select the ones you want, copy them, and paste them into the Pictures folder (or any folder you choose).
Once the transfer is complete, you can access your photos by opening the saved folders on your computer.
This method gives you direct control over which files you copy, making it a flexible way to move your iPhone photos without additional apps.
Also read: How to Turn On a Computer
Conclusion
Learning how to transfer photos from an iPhone to a computer is an essential step for keeping your memories safe, freeing up storage, and making your pictures easier to manage. The good news is that there’s no single “right” way to do it — iCloud, iCloud.com, the Windows Photos app, AutoPlay, and File Explorer all give you dependable options depending on your setup.
If you value speed and direct control, a USB cable is the fastest route. If you prefer convenience and flexibility, wireless syncing with iCloud is a smart choice. No matter which method you choose, following these steps ensures your photos stay secure, organized, and always accessible on your Windows PC.
Also read: Why Is My Computer Fan So Loud
Frequently Asked Questions(FAQ)
1. Why won’t my iPhone photos show up on my PC?
If your iPhone photos are not appearing on your PC, it’s usually because of a connection or settings issue. First, make sure you are using a genuine Apple USB cable, as some third-party cables may only charge your device but won’t transfer data. Also, ensure your iPhone is unlocked and that you tapped Trust This Computer when prompted. Updating iTunes and Windows drivers can also fix detection issues. In some cases, the photos may be stored in iCloud instead of your device, so enable iCloud Photos or download the originals before trying to transfer.
2. Can I transfer photos from iPhone to computer without iTunes?
Yes, you can move your pictures without using iTunes at all. Methods like File Explorer, Windows Photos app, AutoPlay, and iCloud.com work perfectly without needing iTunes for the actual transfer. However, iTunes is still useful in the background because it helps Windows recognize your iPhone drivers correctly. If you want the simplest approach without installing extra software, using File Explorer with a USB cable or logging in to iCloud.com are both effective options.
3. What is the fastest way to move photos from iPhone to a Windows computer?
The fastest method depends on how many photos you need to transfer. For a large library, connecting your iPhone with a USB cable and using File Explorer or the Windows Photos app gives the quickest results because the files move directly without needing internet. Wireless methods like iCloud are more convenient, but they can take longer if you have thousands of pictures or a slow Wi-Fi connection. For speed and control, a wired USB transfer is the best option.
4. How do I transfer photos from iPhone to PC without using iCloud?
If you don’t want to rely on iCloud, you can connect your iPhone directly to your computer with a USB cable. On Windows 8 or 10, open the Photos app or File Explorer to copy your pictures. On Windows 7, AutoPlay provides the same function. These methods let you access your iPhone’s DCIM folder and move photos manually. It’s a reliable option when you don’t have internet access, or if you want to avoid syncing with cloud services altogether.
5. Why are my iPhone photos not transferring in full quality to my computer?
This often happens because of your iPhone’s photo storage settings. If “Optimize iPhone Storage” is turned on under Settings > Photos, your device keeps smaller versions of images on your phone while the originals stay in iCloud. When transferring, you might end up with compressed files instead of full-resolution ones. To fix this, select Download and Keep Originals so the device stores the highest-quality versions locally. Also, check your transfer settings in iCloud for Windows or the Photos app to confirm you are downloading images in their original quality.

