How to Wire a Ceiling Fan to a Switch

Installing a ceiling fan and wiring it to a wall switch is a great way to improve air circulation and add convenience to your home. Whether you’re upgrading an existing fixture or starting from scratch, knowing how to wire a ceiling fan to a switch is key to a safe and efficient setup. This process involves understanding your home’s electrical wiring, safely connecting the correct wires, and ensuring everything is securely installed. With the right tools, clear instructions, and a focus on safety, even a beginner can take on this DIY project with confidence.

Types of ceiling fans
Here is a list of the common types of ceiling fan switches along with brief explanations:
1. Pull Chain Switch:This is one of the most common and traditional types of ceiling fan switches. It typically hangs from the fan and allows you to control the fan speed and/or light by pulling the chain. Each pull usually cycles through different speed settings (low, medium, high, and off) or toggles the light on and off.
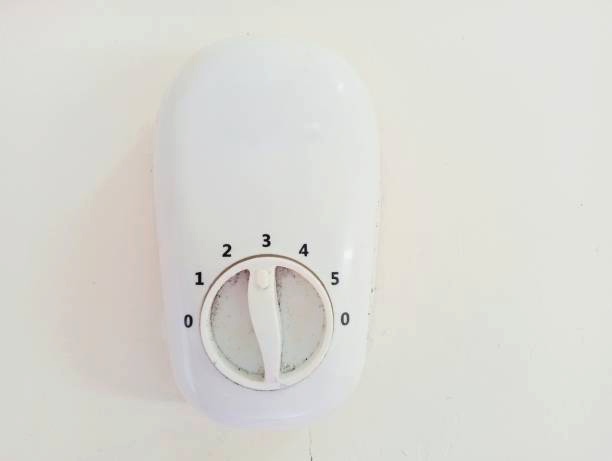
2. Wall Switch:A wall switch is installed in the wall like a typical light switch. It can come in different forms such as single-pole (controls either the fan or the light), double-pole (controls both fan and light separately), or with a speed control dial or slider for fan speed adjustment. Wall switches offer convenient access and control.
3. Remote Control Switch:This type of switch allows you to operate the fan and light wirelessly using a handheld remote. It offers flexibility and often includes features like multiple speed settings, light dimming, a timer, and sometimes reverse function. A receiver is usually installed inside the fan canopy to receive signals from the remote.
4. Rotary or Slide Switch (on fan housing): These are manual switches located directly on the fan motor housing. A rotary switch is turned to select the desired speed or setting, while a slide switch might be used to change the fan’s direction (for summer or winter modes).
Each type of ceiling fan switch provides different levels of control, convenience, and compatibility with modern technology, allowing users to choose the best option based on their preferences and needs.
steps to wire your ceiling fan to a switch effectively:
Materials Needed:
- Ceiling fan with wiring kit
- Switch (single-pole switch or dimmer, depending on preference)
- Wire cutters/strippers
- Screwdriver
- Electrical tape
- Voltage tester
- Wire nuts
- Electrical box (if installing a new switch)
1. Turn Off the Power: *Safety first*—before doing any electrical work, ensure that the power is turned off. Locate the breaker that controls the ceiling fan and flip it to the off position. Double-check using a voltage tester to confirm no current is running through the wires.
2. Prepare the Ceiling Fan Wiring:Once the power is off, install the ceiling fan according to the manufacturer’s instructions. Typically, the fan will have three wires:
- Black (hot wire)
- White (neutral wire)
- Green or bare copper (ground wire)
If you’re replacing an existing fan, you should see similar color-coded wires already in place.
3. Prepare the Switch Wiring:If you’re adding a new switch, you’ll need to run wiring from the fan to the switch. You’ll typically use 14/3 or 12/3 gauge wire, which includes a black, white, and red wire. If your ceiling fan has separate wires for fan and light control, this wire setup will allow independent operation.
Step 4: Connect the Ceiling Fan Wires:
- Ground Wire: Connect the fan’s ground wire (bare copper or green) to the grounding screw in the electrical box or to the ground wire from the power source.
- Neutral Wire: The white wire from the fan connects to the white (neutral) wire in your electrical box or existing wiring.
- Hot Wires:
- If you’re controlling both the fan and light with separate switches, connect the black wire from the fan to the black (hot) wire coming from your power source.
- For a single switch, both the fan and light can be connected to the black wire from the power source, depending on the wiring system.
5: Connect the Switch:If using a single-pole switch, connect the black wire from the fan to the switch terminal. Then, connect the red or black wire from the power source to the other terminal of the switch.
Step 6: Secure and Insulate Wires: Use wire nuts to connect the corresponding wires (black to black, white to white, etc.). Then, wrap the connections with electrical tape for extra safety. Ensure that no bare wire is exposed.
Step 7: Install the Switch and Fan:Once all wires are securely connected, attach the switch to the electrical box and cover it with a faceplate. For the ceiling fan, mount it securely to the ceiling and ensure it’s properly aligned.
Step 8: Test the Fan:Finally,Switch the breaker back on and test the fan using the wall switch. Ensure that both the fan and light (if applicable) operate properly. If the fan doesn’t operate, double-check all connections.

Wiring a Single Switch Ceiling Fan
Here are the steps for wiring a single-switch ceiling fan:
1. Turn Off Power at the Circuit Breaker:Before starting any electrical work, ensure safety by switching off the power supply at the circuit breaker. Use a voltage tester to confirm there’s no power running to the fan’s electrical box.
2. Mount the Ceiling Fan Bracket:Install the mounting bracket that comes with your ceiling fan to the ceiling electrical box. This bracket will support the fan, so make sure it’s securely fastened and the box is rated for fan support.
3. Connect the Ground Wires:Twist together the bare copper or green wires from the ceiling, fan, and mounting bracket. Secure them with a wire connector or grounding screw. This prevents electrical shock in case of a fault.
4. Connect the Fan Wires to the House Wires: Typically, connect the black (fan motor) wire from the fan to the black (hot) wire from the ceiling. If there’s a blue wire (for light), also connect it to the same black wire if you’re using a single switch for both light and fan. White wires (neutral) from both the ceiling and fan are twisted together. Secure all connections with wire nuts.
5. Secure the Fan and Attach the Blades:Once wiring is complete, push the wires into the electrical box carefully. Mount the fan body to the bracket according to the manufacturer’s instructions, then attach the fan blades and light kit (if included).
6. Restore Power and Test the Fan:Turn the power back on at the circuit breaker. Flip the wall switch to test that the fan and light (if connected) are working properly. Check fan speeds and light functionality to ensure everything is wired correctly.
Wiring a Double Switch Ceiling Fan Steps:
1. Turn off power:Switch off the power to the circuit at the main electrical panel to ensure safety while working
2. Identify wires: Identify the black (hot), white (neutral), and copper (ground) wires from the ceiling and fan.
3. Connect ground wires: Connect the copper ground wires from the ceiling and fan to the grounding screw or clip.
4.Connect black wires to switch:Connect the black wire from the ceiling to the common terminal on the double switch. Then, connect the fan’s black wire to one switch terminal and the light’s black wire to the other switch terminal.
5. Connect white wires: Connect the white neutral wires from the ceiling, fan, and light together using wire nuts or connectors.
6. Secure connections:Double-check all connections to ensure they are secure and not loose.
7. Test: Turn the power back on and test the fan and light to ensure they are working correctly and independently with the double switch.
Wiring a Ceiling Fan with Light Typical Wiring Steps:
1. Turn off power:Ensure the power is off at the main electrical panel.
2. Identify wires:Identify the black (hot), white (neutral), and copper (ground) wires.
3. Connect ground wires: Connect the copper ground wires from the ceiling and fan/light to the grounding screw.
4. Connect black wires: Connect the black wire from the ceiling to the fan’s black wire and the light’s black wire.
5. Connect white wires: Connect the white wires from the ceiling, fan, and light together.
6. Optional pull chain or remote: If your fan has a pull chain or remote control, follow the manufacturer’s wiring instructions.
7. Test:Turn the power back on and test the fan and light.
Tips:
- If you’re unfamiliar with electrical work, it’s always best to consult a licensed electrician to ensure the job is done safely and according to code.
- If you’re installing a fan with a light kit, you might need to connect separate wiring for each function to a dual switch.
Common Mistakes to Avoid When Wiring a Ceiling Fan to a Switch
- Neglecting Proper Grounding: Always ensure that the fan is properly grounded to avoid electrical shocks.
- Incorrect Wire Connections: Double-check that hot, neutral, and ground wires are connected correctly to prevent damage or short circuits.
- Overtightening Wires: When securing connections with wire nuts, don’t overtighten them to the point of damaging the wires.
Conclusion
Wiring a ceiling fan to a switch is a straightforward task when you follow the right steps. By ensuring the correct wiring, choosing the right tools, and installing the fan securely, you can enjoy a comfortable environment with easy control over your ceiling fan. Always prioritize safety, and if you’re unsure about any part of the process, don’t hesitate to call a professional electrician.
Wiring a ceiling fan to a wall switch improves convenience and energy efficiency.By following these steps carefully, you should be able to wire your ceiling fan to a switch and enjoy reliable performance.
Common Questions or FAQs
1. What is the correct way to wire a ceiling fan to a wall switch?
To wire a ceiling fan to a wall switch, turn off the power at the breaker, then connect the fan’s black (fan power) and blue (light power, if present) wires to the switch’s load wire. Connect the white wires (neutral) together and the green or bare copper wires (ground) together. Use wire nuts to secure all connections. Finally, mount the fan, install the switch cover, and turn the power back on. Always follow local electrical codes and manufacturer instructions.
2. Can I wire a ceiling fan and light to separate switches?
Yes, you can wire a ceiling fan and its light to separate switches for independent control. This typically involves running a three-wire cable (black, red, white, and ground) from the switch box to the fan. The black wire controls the fan, the red wire controls the light, and the white is the shared neutral. This setup allows you to turn the fan and light on or off separately from the wall.
3. Do I need a special switch to control a ceiling fan?
While a standard single-pole switch can control a ceiling fan, a fan control switch or dual-function switch offers better functionality. These specialized switches allow you to adjust fan speed and light brightness. If your ceiling fan has a remote or pull chain, you can use a standard switch to simply cut power. For advanced control, consider installing a smart switch compatible with ceiling fans.
4.How do I wire a ceiling fan to a switch with power at the light?
If power comes to the ceiling fixture first, you’ll run a switch loop down to the wall. Connect the always-hot black wire to the white wire going to the switch (mark it with black tape). Then the black wire returning from the switch connects to the fan’s black wire. Neutral and ground wires stay connected in the ceiling box. This setup lets the switch control the fan or light.
5. Is it safe to wire a ceiling fan to a switch without an electrician?
It can be safe to wire a ceiling fan to a switch yourself if you have basic electrical knowledge and follow safety precautions. Always turn off power at the breaker, use a voltage tester, and follow the manufacturer’s wiring diagram. However, if you’re unsure or local building codes require it, it’s best to hire a licensed electrician to avoid potential hazards or code violations.

