How to Clean a Toaster
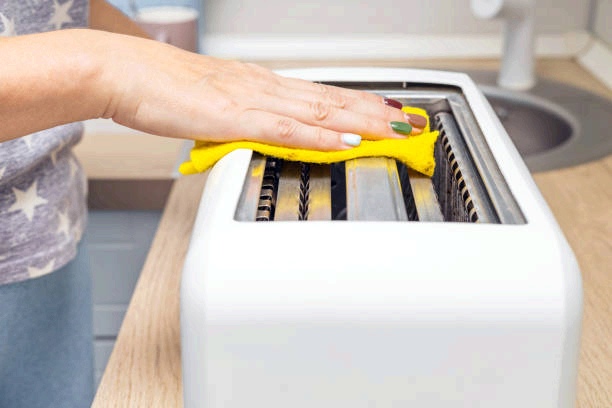
A toaster is one of those kitchen appliances we often take for granted until it starts smelling burnt or toasting unevenly. Over time, crumbs, grease, and even melted plastic can build up, affecting both the look and performance of your toaster. If you’ve ever wondered how to clean a toaster properly without causing damage, you’re in the right place. This simple step-by-step guide will show you how to clean both the inside and outside of your toaster safely, remove stubborn crumbs, eliminate bad odors, and even deal with melted plastic. Whether you use your toaster daily or just on weekends, keeping it clean ensures it runs efficiently and keeps your kitchen looking sharp.
Why It’s Important to Keep Your Toaster Clean
Keeping your toaster clean isn’t just about looks—it helps it perform better, last longer, and keeps every slice of toast tasting fresh. Plus, a well-maintained toaster is much safer to use. Here’s why giving your toaster a regular clean is worth the effort:
1. Reduce the Risk of Fire
Over time, crumbs and small food particles can collect at the bottom of your toaster. These can easily catch fire if not cleaned out. Regular cleaning helps eliminate this risk, making your kitchen safer every time you toast.
2. Help Your Toaster Last Longer
When crumbs build up on the heating elements, it can cause uneven toasting or even damage the appliance. Cleaning your toaster helps it work more efficiently and extends its overall lifespan—saving you from buying a new one too soon.
3. Enhance the Taste of Your Toast
Old crumbs and leftover residue can leave a burnt or bitter taste on your toast. A clean toaster ensures each slice comes out tasting just right, whether you enjoy it with jam, peanut butter, or on its own.
4. Keep Your Countertop Looking Neat
Since toasters often sit out on the counter, a dirty one can make your whole kitchen look untidy. Regularly wiping down the exterior keeps it shiny and clean, contributing to a more polished kitchen space.
5. Prevent Bad Smells
Lingering crumbs can produce unpleasant odors over time—especially when they get burnt. Cleaning your toaster regularly keeps unwanted smells at bay and leaves your kitchen smelling fresh.
How to clean your toaster
What You’ll Need to Clean Your Toaster
Before you begin, gather the following items to make the cleaning process smooth and efficient:
- A soft cloth or sponge
- Mild dish soap
- Warm water
- A small brush (toothbrush works well)
- Baking soda (optional for tough stains)
Step 1: Unplug and Let the Toaster Cool
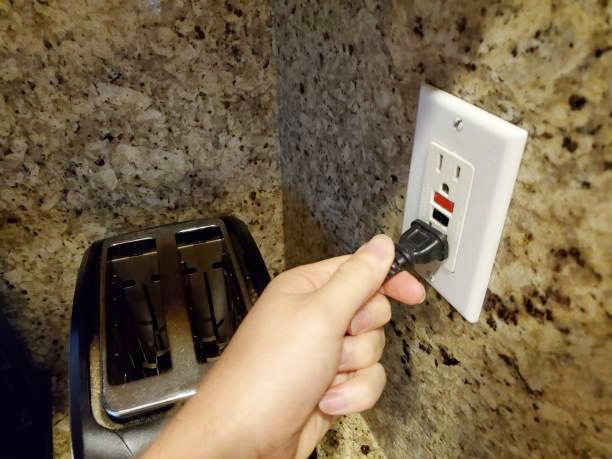
Always make sure to unplug your toaster before cleaning it. Putting anything other than food inside while it’s still connected to power can lead to electric shock or even start a fire. After unplugging, give the appliance time to cool down fully before you begin the cleaning process.
Step 2: Remove Crumbs and Loose Debris
Turn your toaster upside down over a sink or trash can to release any crumbs or loose debris that have gathered. Shake gently to dislodge any stubborn part.
Step 3: Clean the Exterior
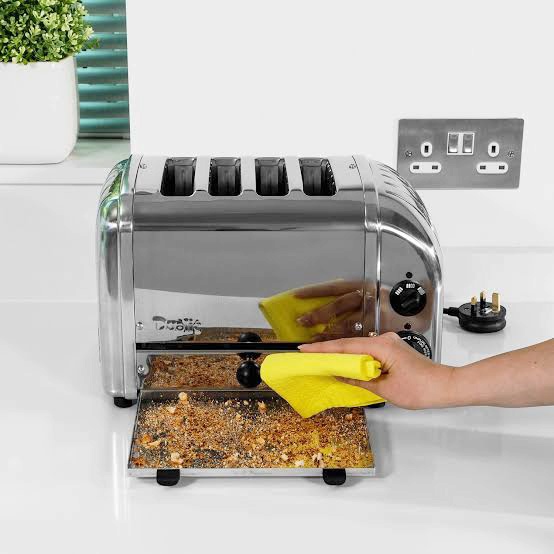
Using a damp cloth or sponge, wipe down the exterior of the toaster to remove dust and grease. Avoid using harsh chemicals, as they can damage the surface. For tough spots, a mixture of dish soap and warm water should do the trick.
Step 4:Gently Sweep Out Crumbs from Inside the Toaster
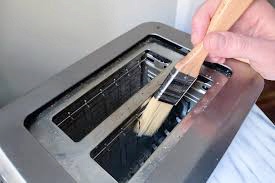
After taking out the crumb tray, use a pastry brush to carefully remove any leftover crumbs from inside the toaster. Avoid sticking your fingers into the slots, as this could harm both your hand and the toaster’s internal parts. If you can, try brushing from both the top and bottom openings for better results.
Step 5. Wipe Down the Toaster’s Outer Surface
Use a damp dishcloth or sponge soaked in mild soapy water to gently clean the outside of the toaster. Make sure to wring out excess liquid so the cloth is only slightly damp. Focus on areas like the levers, knobs, and handles, as these spots often collect grime. If your toaster has removable dials, take them off and wash them separately in the soapy water.
After cleaning, go over the surface again with a clean sponge dipped in plain water to remove any leftover soap. Finish by drying everything thoroughly with a soft microfiber towel to avoid water spots or streaks.

8. Step 6: Clean the Tray and Reseal the Toaster
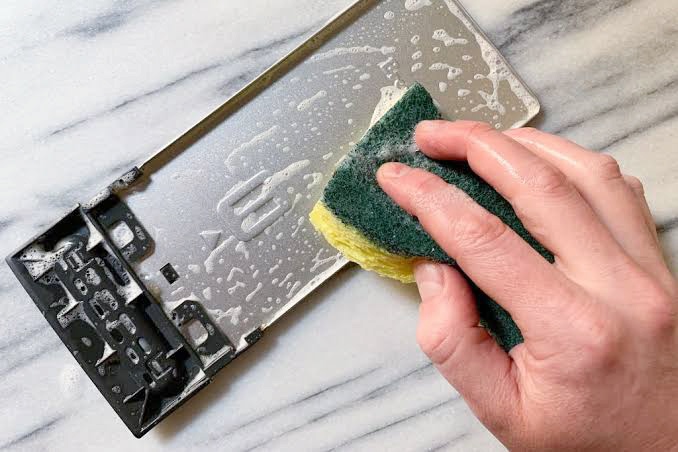
After cleaning, remove the toaster’s crumb tray and wash it with warm soapy water. Make sure it’s thoroughly dried before reinserting it into the toaster. If you have a toaster with a removable tray, ensure it’s properly sealed to prevent future crumb accumulation.

9. Step 7: Dry and Reassemble
Once all parts are cleaned and dried, carefully reassemble your toaster. Plug it back in, and you’re good to go! A clean toaster means a better and safer breakfast experience.
Safely Removing Melted Plastic from a Toaster
Accidentally got melted plastic stuck on your toaster? Here’s how to safely remove it without damaging the surface:
- First, unplug the toaster and let it cool down completely.
- Use a wooden or plastic scraper to gently lift off as much of the melted plastic as you can.
- [Image Here – scraping melted plastic from toaster]
- Sprinkle baking soda onto a damp sponge and scrub the affected area.
- Wipe the surface clean with a damp sponge. Repeat the process until no more residue remains.
- For any leftover discoloration, dip a cotton ball in nail polish remover (with acetone) and rub the area gently. Use fresh cotton balls as needed.
- Finish by wiping the toaster’s surface with a clean, damp cloth.
Easy Tips for Keeping Your Toaster Crumb-Free
- Before placing slices in the toaster, shake off any loose crumbs to prevent buildup inside the slots.
- Keep plastic bags or packaging away from the toaster to avoid accidental melting.
- Never insert items like parchment paper, plastic, styrofoam, or foil into a pop-up toaster — they can pose a fire risk and damage the appliance.
Conclusion
Knowing how to clean a toaster the right way not only keeps your kitchen tidy, but it also helps your appliance last longer and work more efficiently. From removing crumbs and grease to dealing with stubborn issues like melted plastic, regular toaster maintenance prevents fire risks, eliminates bad odors, and ensures each slice of toast comes out perfect. Whether you use your toaster daily or occasionally, following the cleaning steps in this guide will help protect your appliance and give you peace of mind every time you press that lever.
For more practical home cleaning tips, safety guides, and tech-savvy advice, stay updated with HighTechPlugged your go-to source for smart household care.
Common question or FAQ
1. What is the safest way to remove melted plastic from a toaster?
The safest way is to unplug the toaster first and allow it to cool down completely. Then, carefully use a wooden or plastic scraper to remove the melted plastic. Finish by cleaning the surface with a baking soda paste on a sponge. This method is gentle, effective, and avoids scratching the toaster.
2. Can I use nail polish remover to clean melted plastic off a toaster?
Yes, you can! Acetone-based nail polish remover works well for cleaning leftover discoloration after removing the plastic. Simply dip a cotton ball in the remover and gently rub the area. Always use a clean, damp cloth afterward to wipe away any remaining chemical.
3. Is it dangerous to use a toaster with melted plastic on it?
Absolutely. Using a toaster with melted plastic can be a serious fire hazard. It may also release toxic fumes when heated. It’s important to fully remove the plastic before using the appliance again to ensure safety.
4. How do I prevent plastic from melting on my toaster?
To avoid accidents, always keep plastic bags, containers, or food wrappers far from the toaster. Also, never rest anything plastic on top of the toaster, even when it’s off. A little caution goes a long way in protecting your appliance.
5. What cleaning tools are best for removing plastic from appliances?
The best tools include a wooden or plastic scraper to lift off melted material without scratching, a damp sponge with baking soda for scrubbing, and acetone with cotton balls for cleaning tough stains. Avoid using metal tools as they can damage the finish.

